

Team Dashboard
What is the Team Dashboard?
The Team Dashboard allows you to manage your members and the team, plan meetings and events, and view all cases. Everything is clearly organised in one place.
Open the Dashboard
Complete the setup
Before you can see your team in the Team Dashboard, you need to set it up in Team Management.
Open the Team Dashboard
On the home page of the Team Dashboard, you’ll see all the teams you have access to. Select your chosen team in the Team Dashboard.
I can't see my team
The bot checks 5 points; you will only be granted access to the team if all 5 points are successfully verified.
- Is the bot on the server?
- Are you on the server?
- Is the Team Management module in the dashboard enabled and configured?
- Do you have the Team role?
- Do you have a role from the career path?
You can check this by clicking the Server missing? button and selecting the desired server from the list (home page).
 or by using the button below the information if you are viewing a team.

Start
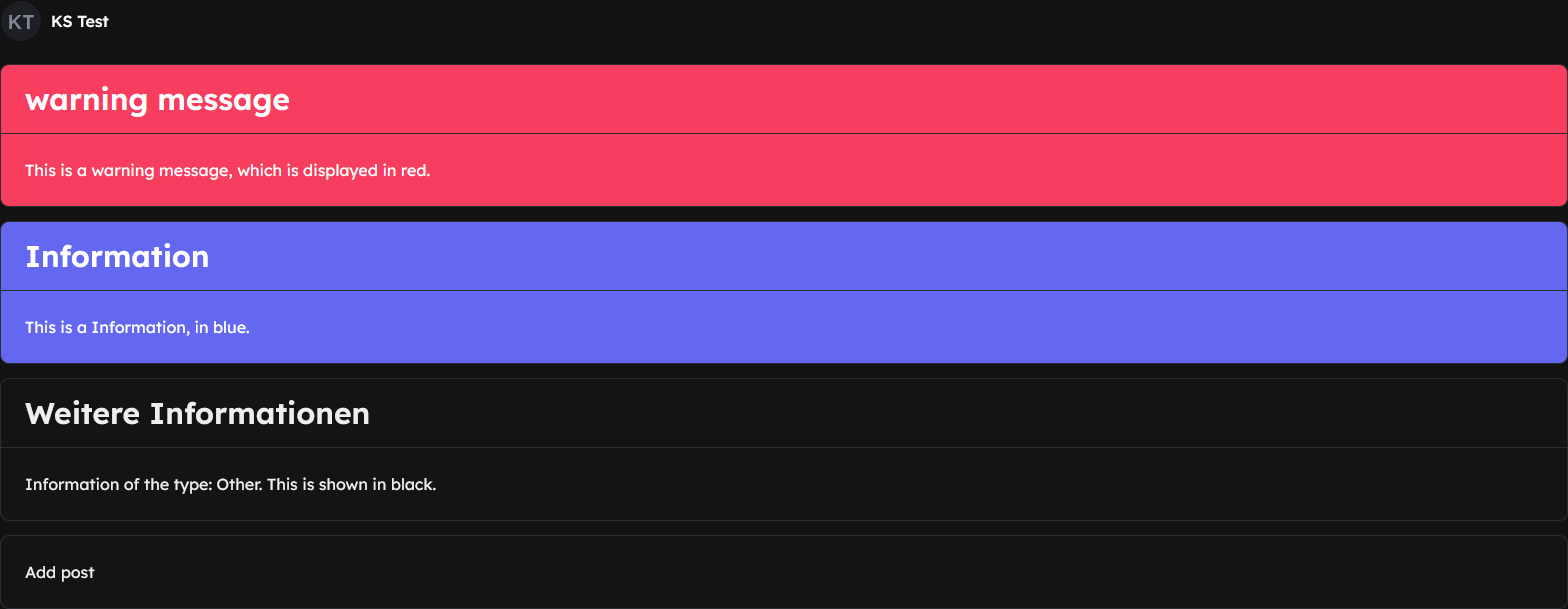
Once you’ve opened it, you’ll be taken to your team’s home page. All posts and announcements are displayed here in chronological order. On the left-hand side is the navigation bar, which gives you access to all the features.
Add a post
Click on the Add a post text box to open the editor and create a new post.
Fill in the form
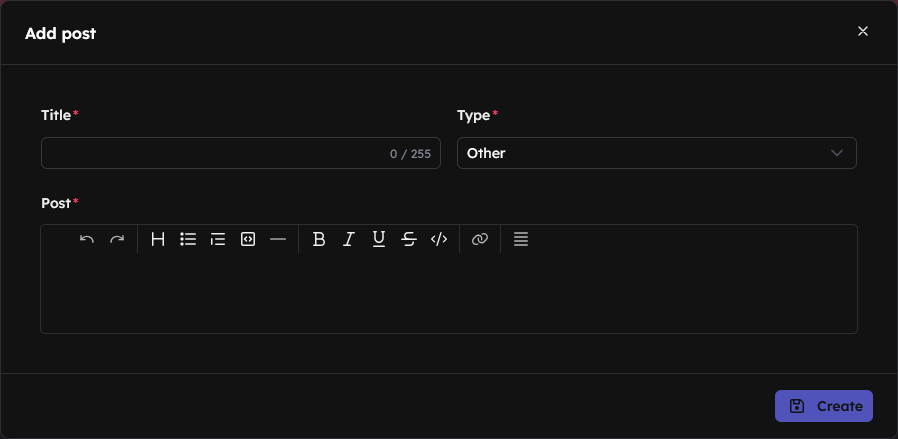
- Title: The post’s headline (max. 255 characters).
- Type: Determines how the post is displayed.
- Other: Standard post with no special formatting.
- Information: Blue box.
- Warning: Red box.
- Post: Content of the post. The editor supports Markdown, which can also be used via the buttons above the input field.
Publish
Click on . The post will then be immediately visible to all team members.
Manage posts
All posts are displayed in a clear list. By clicking on a post, you can change its settings at any time. To edit the post: | to delete the post: .
When editing, you can change the title, post and type. To save: | to cancel: .
Mine
Click on Mine in the navigation bar to open your personal area.
Profile
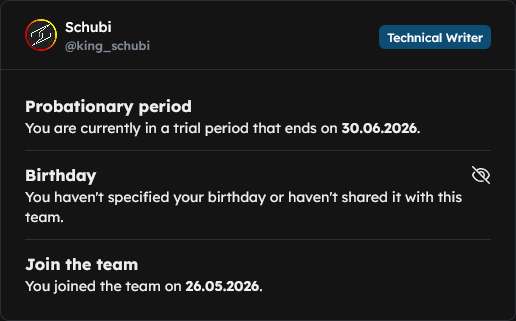
At the top left, you’ll see your profile card showing your current username and team rank. Below that, you’ll also see your ticket rating, date of birth and join date.
You can adjust the visibility and edit your date of birth in .
Report absence
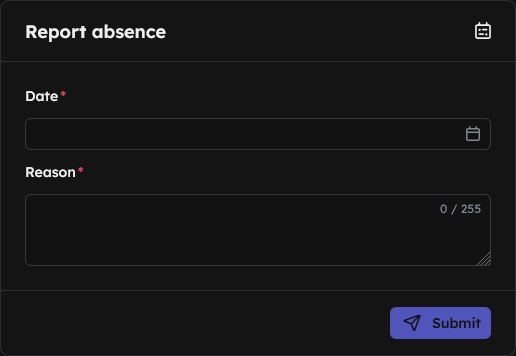
Enter your absences here:
- Date: Start and end dates of the absence. You can also optionally enter the time for both dates below. The date is mandatory.
- Reason: A brief explanation for the absence (max. 255 characters). The reason is mandatory.
Then click on .
All absences
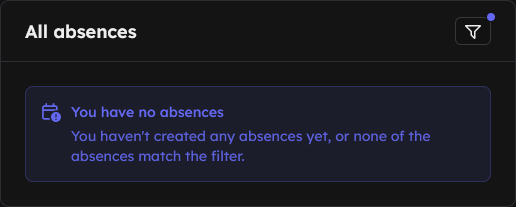
Here you can view all your absences and delete them with ().
Complaint box
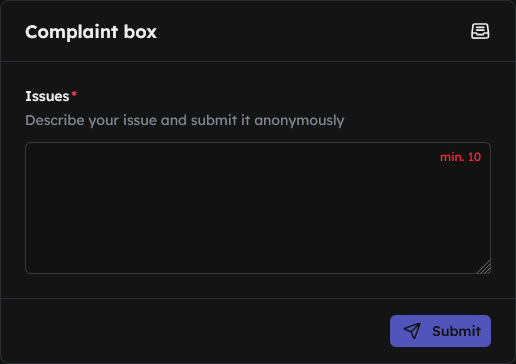
Send anonymous feedback to the team lead here (minimum 10 characters). Messages are completely anonymous.
Upcoming events
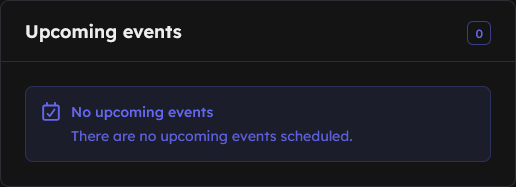
Meetings, workshops, events and other appointments can be viewed here. However, this only includes appointments to which you have been invited (whether optional or mandatory).
Calendar
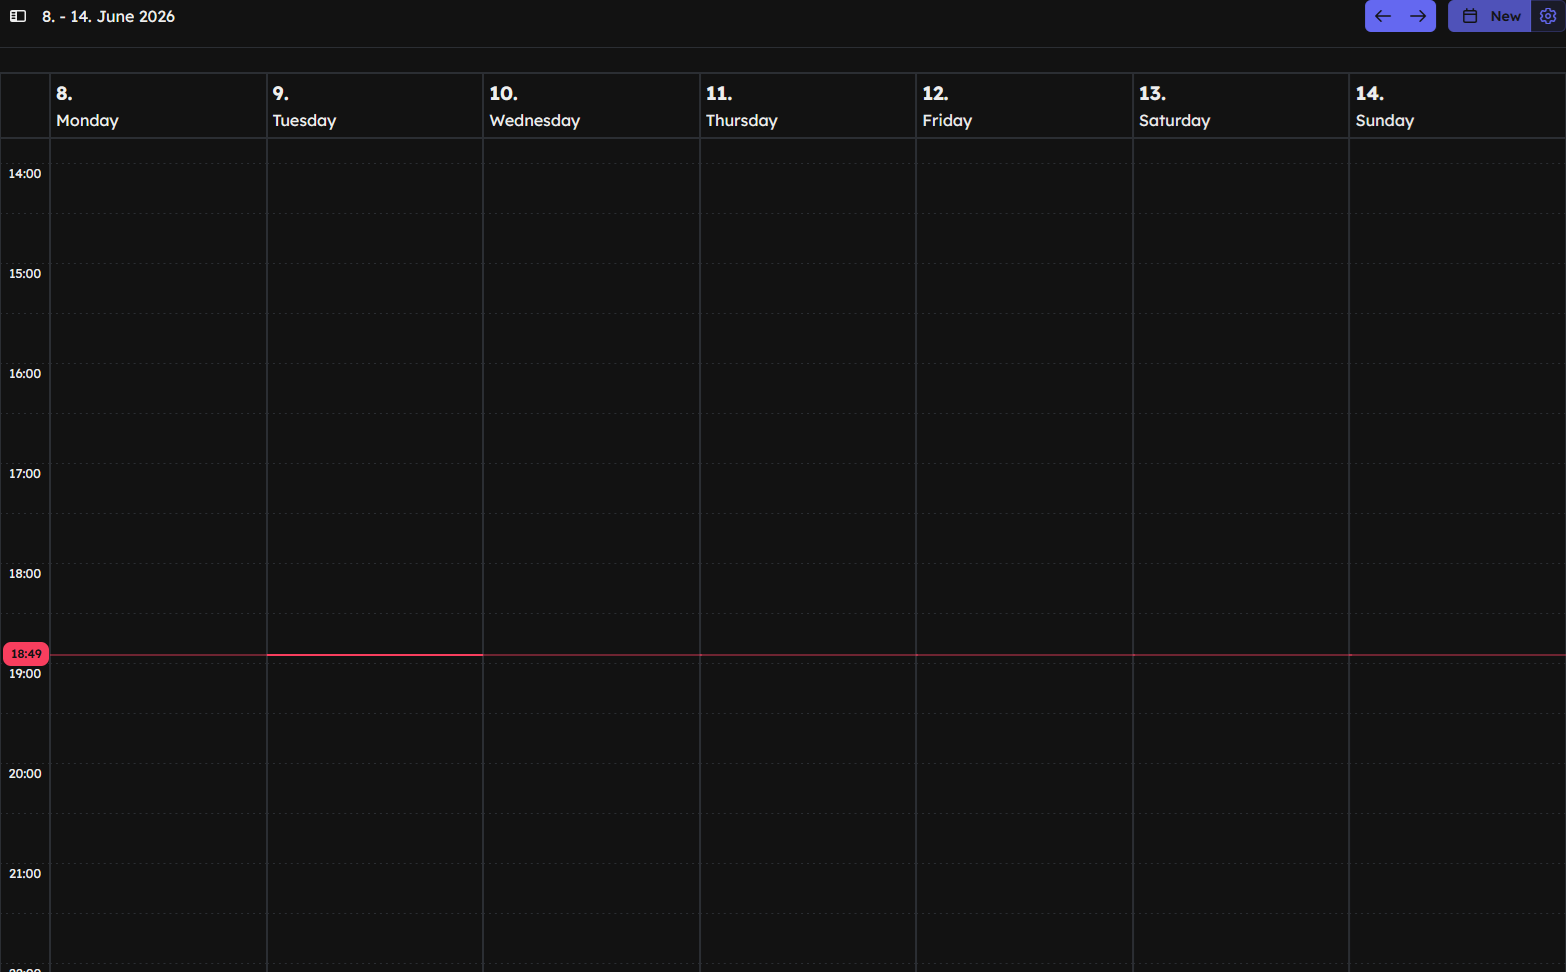
You can view all appointments in your calendar.
Create a new appointment
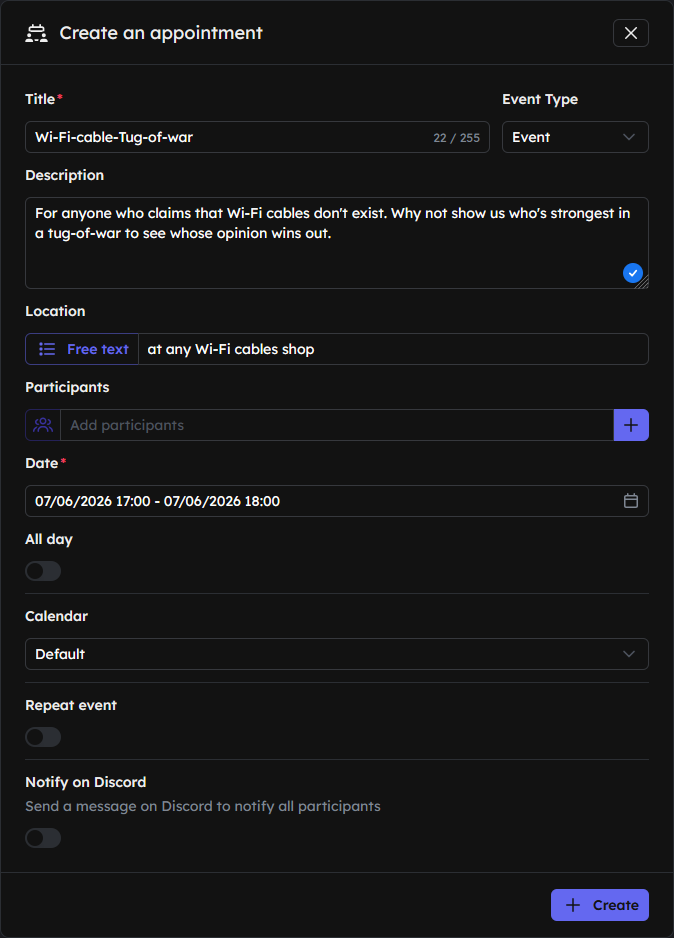
Click on New in the top right-hand corner or directly on an empty slot in the calendar.
- Title: Give your event a descriptive title, e.g. "GalaxyBot Training Course".
- Event Type: Select the category for your event: Meeting, Team Meeting, Workshop, Event or Other.
- Description: Here you can write details about the event. The more detailed and precise you are, the better members will understand what the event is about.
- Location: Here you can enter free text (e.g. a link or description) or specify a Discord channel (voice channel).
- Participants: Here you can invite individual people or entire ranks to the event and specify whether attendance is optional or mandatory for the user.
- Date: Here you can set the date and time (start and end).
- All day: If you have enabled this option, there is no need to specify a time (from 00:00 to 00:00).
- Calendar: Select the calendar in which the event will be saved. Only calendars created in the are displayed.
- Repeat event: Enable this for regularly recurring events.
- Frequency: How often should the event recur: Daily, Weekly, Monthly, Annually.
- Interval: How often should the appointment be repeated (based on the frequency), e.g.
Frequency: DailyInterval: 3= The appointment repeats every 3 days. - Ends after: When should this end: Never, After number of occurrences, After date.
- Number: How many times should the event repeat at the desired interval?
- Date: Until what date should the event repeat at the desired interval?
- Days: Here you can specify on which days the event should be repeated. This option is not available when Daily is selected.
- Notify on Discord: Toggle this switch to enable the bot to notify all participants in the configured Discord channel.
- Discord Channel: If you have enabled the previous option, you can now specify which channel the bot should send the notification to.
Finally, click on .
Calendar settings
You can create multiple calendars to organise your appointments more effectively, e.g. a separate calendar for team meetings and one for community events.
Open settings
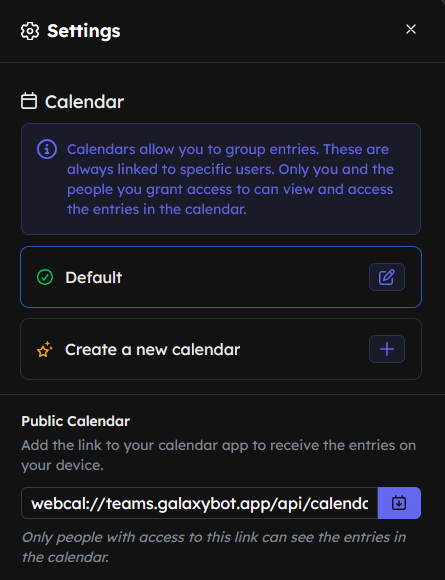
Click on in the top right-hand corner and select Settings.
Create a new calendar
Click on Create new calendar + to create a new calendar.
You can now give your calendar a name and choose a colour so that you can distinguish between events from different calendars at a glance in the overview (events are displayed in the calendar’s colour).
Click on to create the calendar.
Further settings
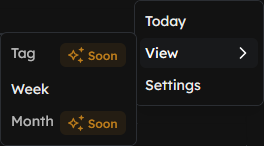
offers even more features:
- Today: This option always takes you to today’s date. Even if you’ve travelled 42 years into the future.
- View: This allows you to change the calendar view.
- Day: The entire calendar shows only the current day. A timeline is displayed at the bottom, with the current time marked in red (only updates when the page is reloaded). However, this is still under development.
- Week: The full calendar displays the days from Monday to Sunday of the current week. A timeline is shown at the bottom, with the current time highlighted in red (this is only updated when the page is refreshed).
- Month: The full calendar displays an entire month, with days of the week from right to left and weeks from top to bottom. There is no timeline here. However, this feature is still under development.
Users
User list

In the User List, you can see all the users currently on the server. Here, you can also view cases and notes, as well as perform moderator actions. On the overview page, you can see 30 users per page. At the very bottom, you can navigate to the next page.
Click on the on the right to open a member’s detailed profile.
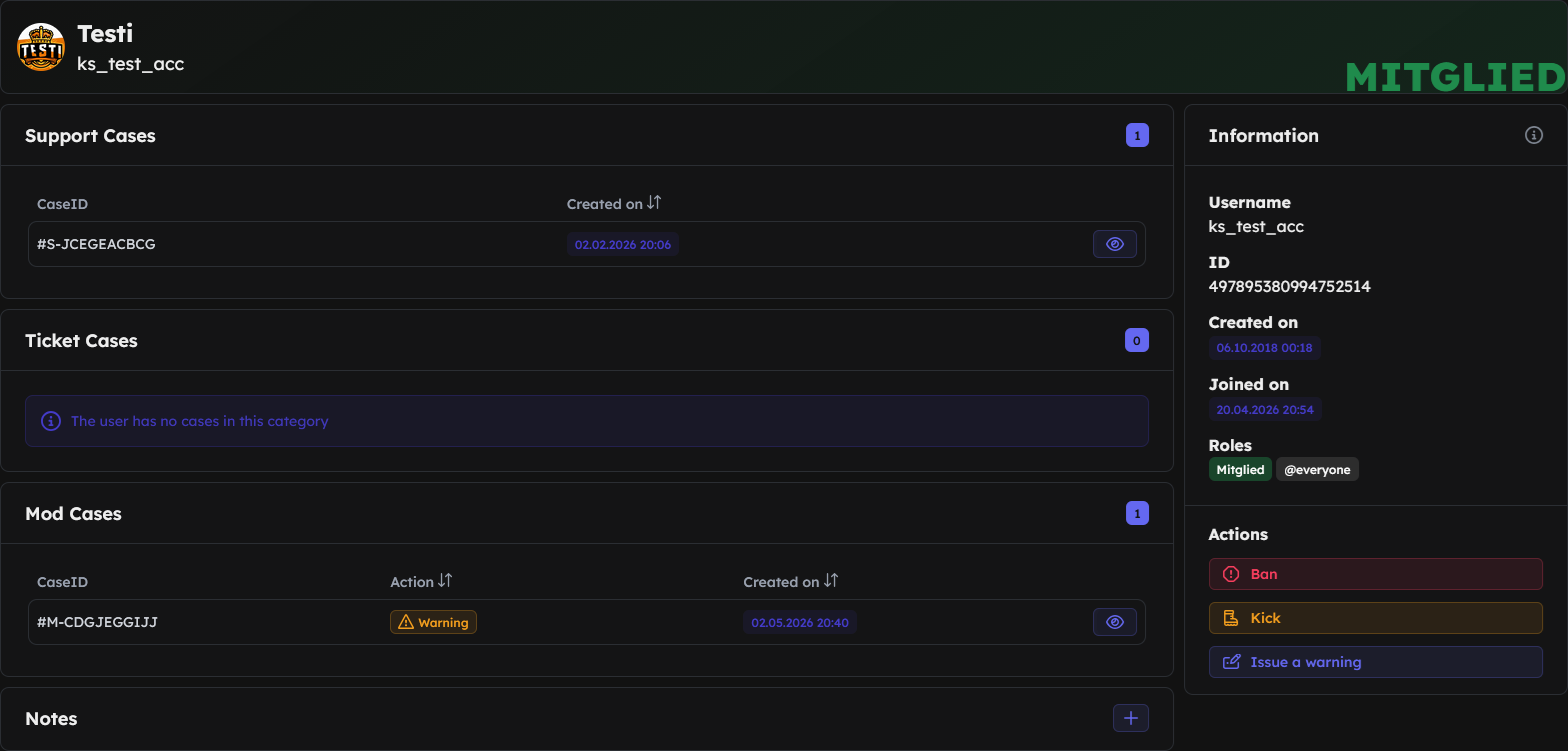
The profile is divided into:
- Left-hand side:
- Support Case (requires the Support Module)
- Ticket Case (requires the Ticket Module)
- Mod Case (requires the Moderation Module)
- Notes (visible to everyone in the Team Dashboard)
- Right-hand side:
- Information
- Username
- User ID
- Account creation date
- Join date
- Roles
- Actions
Removes the user from the server and adds them to the server's ban list. The user can no longer join the server. This can be reversed in the server settings or using the /unban command.
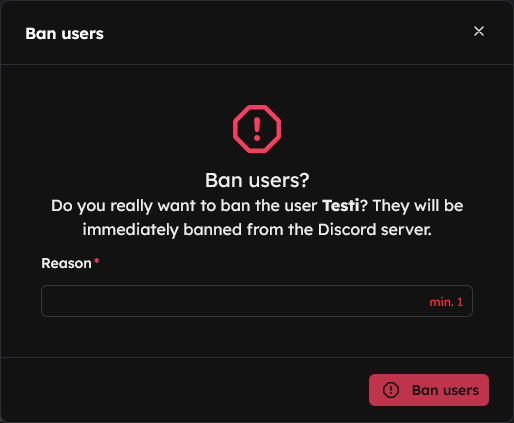
Please fill in the following details in the window that opens:
- Reason: Reason for the ban (max. 255 characters)
Once the user has confirmed, they will be automatically notified of the ban.Required in the Rights group: DC (ban members), ban users. Moderation moduleRemoves the user from the server. However, they can rejoin using an invitation. No invitation is required for a public server.
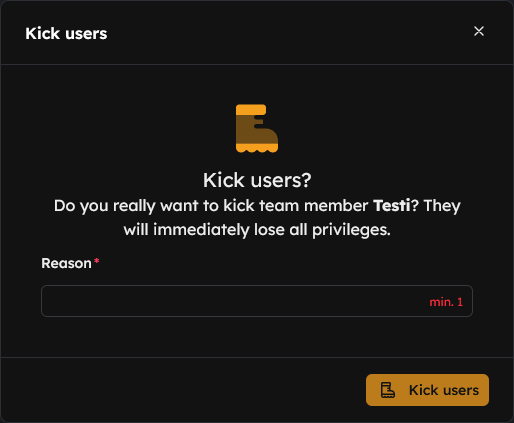
Please fill in the following details in the window that opens:
- Reason: Reason for the ban (max. 255 characters)
Once the user has confirmed, they will automatically be notified of the kick.Required in DC: Kick, accept and reject members. In the Rights group: Kick users. Moderation moduleIssues an internal bot warning to the user. If a maximum value has been set, the specified action will be carried out once that value is reached.
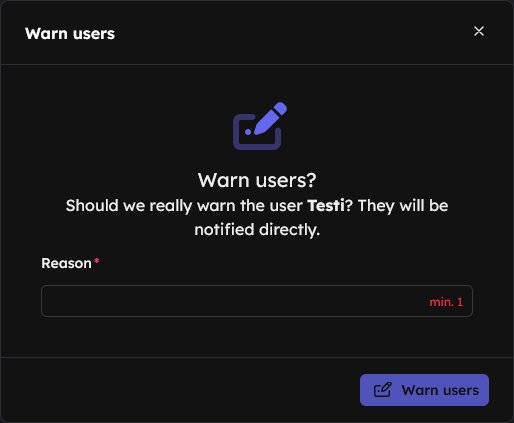
Please fill in the following details in the window that opens:
- Reason: Reason for the warning (max. 255 characters)
Once the user has confirmed, they will be automatically notified of the warning.Required in the Rights group: Warn usersAdds the user to the team.
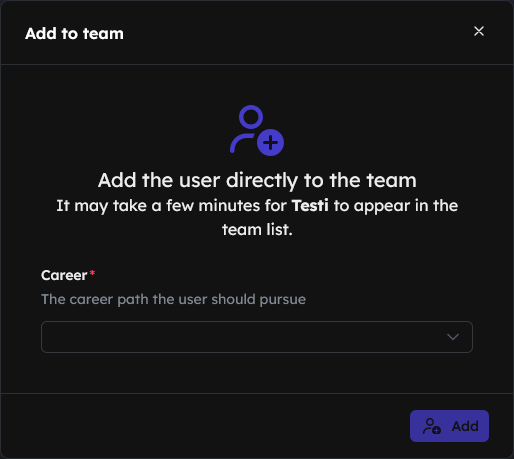
The following details must be entered in the window that opens:
- Career path: What rank should the user be assigned?
Once the user has confirmed, they will automatically be notified of the invitation.Required in the Rights group: Invite users to Team - Information
Cases
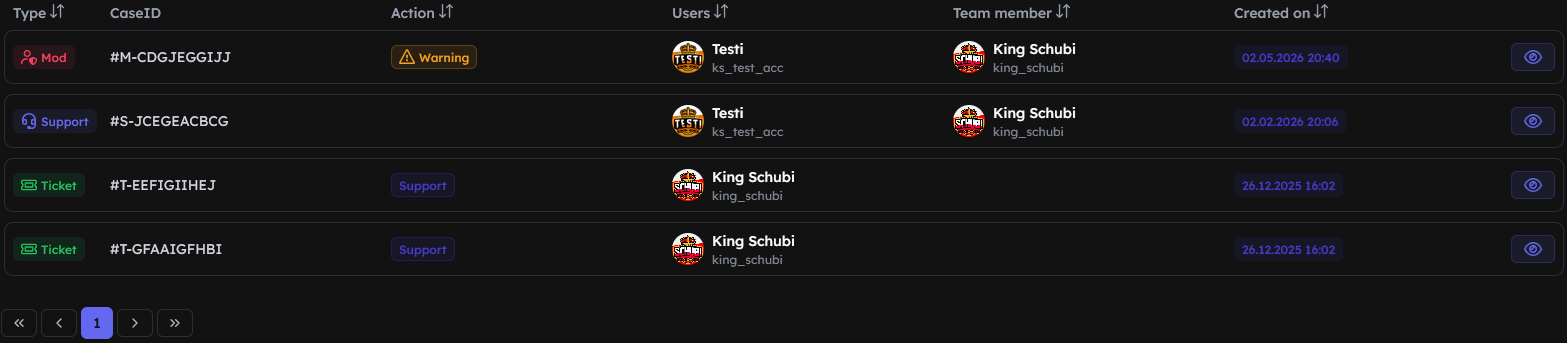
Under Cases, you can view all mod, ticket and support cases recorded on your server. On the overview page, you can always see 30 cases per page; use the icon in the top bar to change the sort order. At the very bottom, you can navigate to the next page.
Click on the on the right to open a case’s detailed profile.
View cases option must be enabled in the Rights group. For users to be able to delete them as well, Manage cases must also be enabled.Mod-Cases
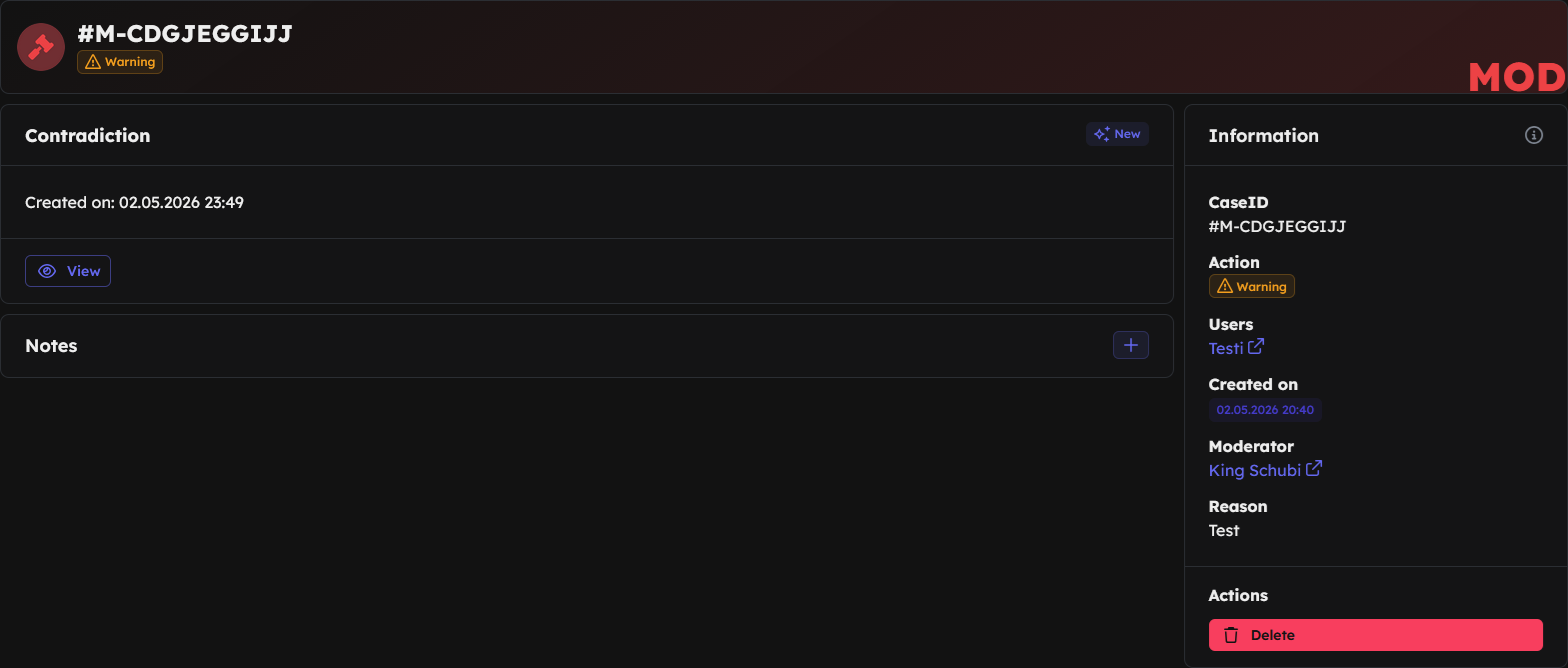
The page is divided into:
- Left-hand side:
- contradiction (if enabled and )
- Notes
- Right-hand side:
- Information about the case
- Case ID
- Action (Ban, Kick, Warning, Timeout, Reversal of an action)
- User (Who is affected)
- Created on (When the action was carried out)
- Moderator (Who carried out the action)
- Reason (Reason given by the moderator)
- Actions
- Delete the case
- Information about the case
Ticket-Cases
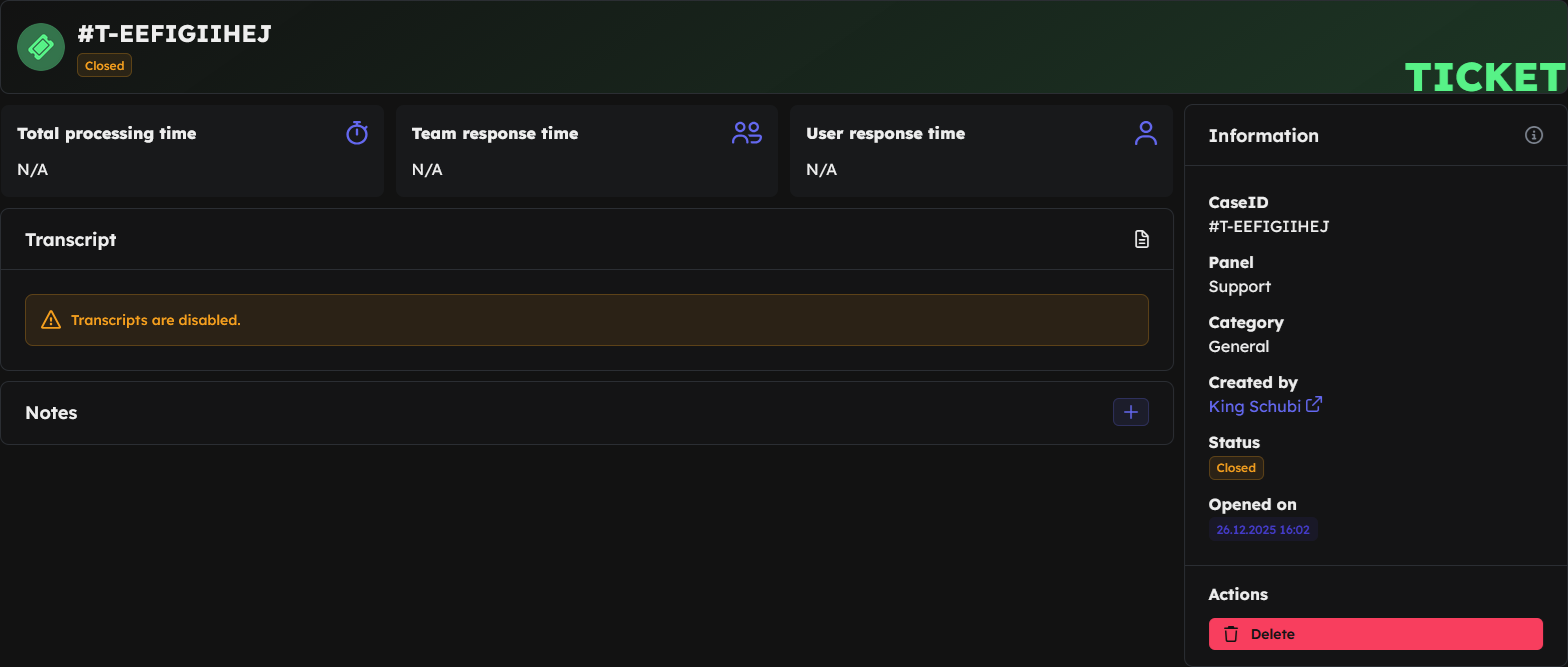
The case is divided into:
- Left-hand side:
- Statistics
- Total processing time
- Team response time
- User response time
- Transcript
- Open ticket form
- Close ticket form
- Rating form
- Notes
- Statistics
- Right-hand side:
- Information about the case
- Case ID
- Panel
- Category
- Creator (who created the ticket)
- Assignee (who has been working on the ticket)
- Status (Is it still open or already closed?)
- Ticket opened date
- Ticket closed date
- Actions
- Delete
- Information about the case
Support-Cases
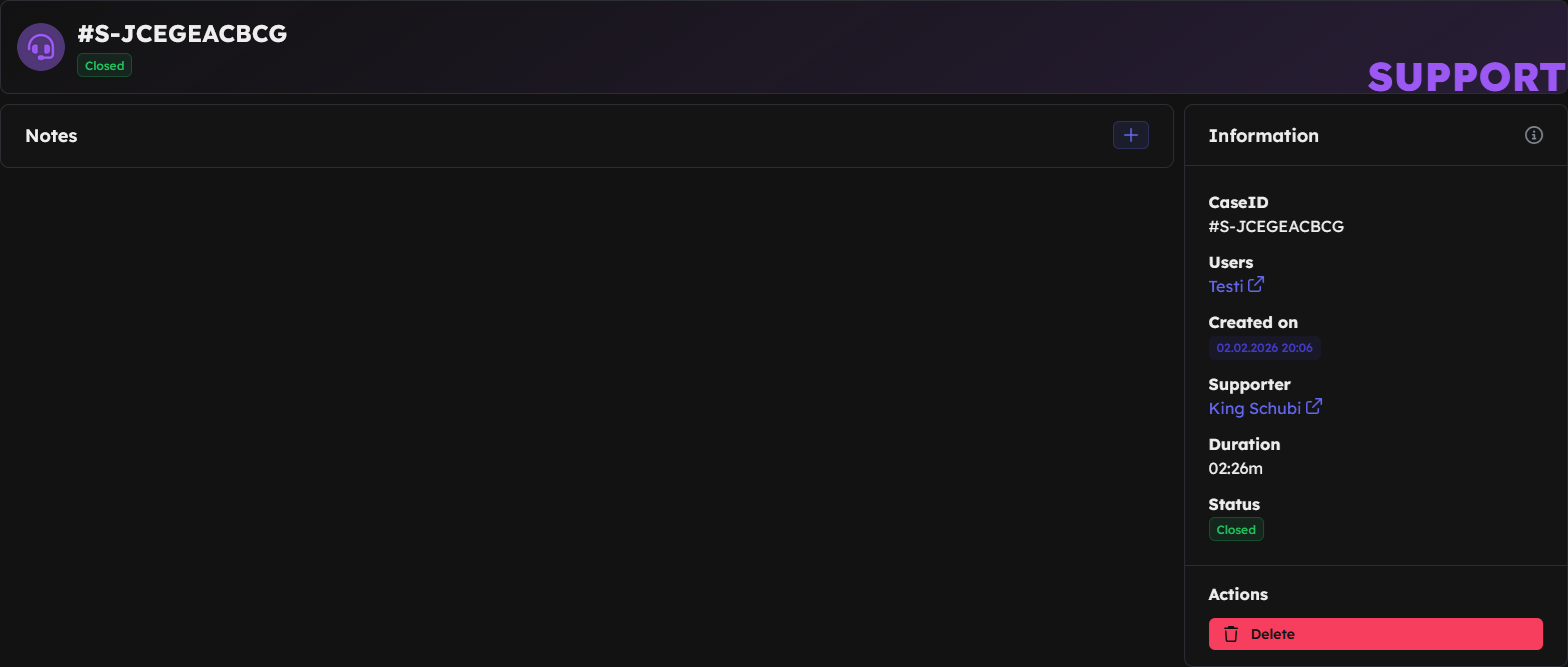
The case is divided into:
- Left-hand side:
- Plenty of space for internal notes
- Right-hand side:
- Information about the case
- Case ID
- User (who received support)
- Created on (when the support took place)
- Supporter (Who the supporter was)
- Status (Is it still open or already closed)
- Actions
- Delete the case
- Information about the case
Contradictions

The contradiction system gives users a one-time opportunity to appeal against a moderator’s action. This is possible for all actions (warning, timeout, kick, ban). On the overview page, you can always see 30 contradictions per page; use the icon in the top bar to change the sort order. At the very bottom, you can switch pages.
Click on the on the right to view detailed information about the contradiction.
View contradictions to view them, Manage contradictions for taking over cases and making decisions, and Take over contradictions (Force) if the case is to be taken over, even if someone else has already taken it over.Submit a contradiction (Server member)
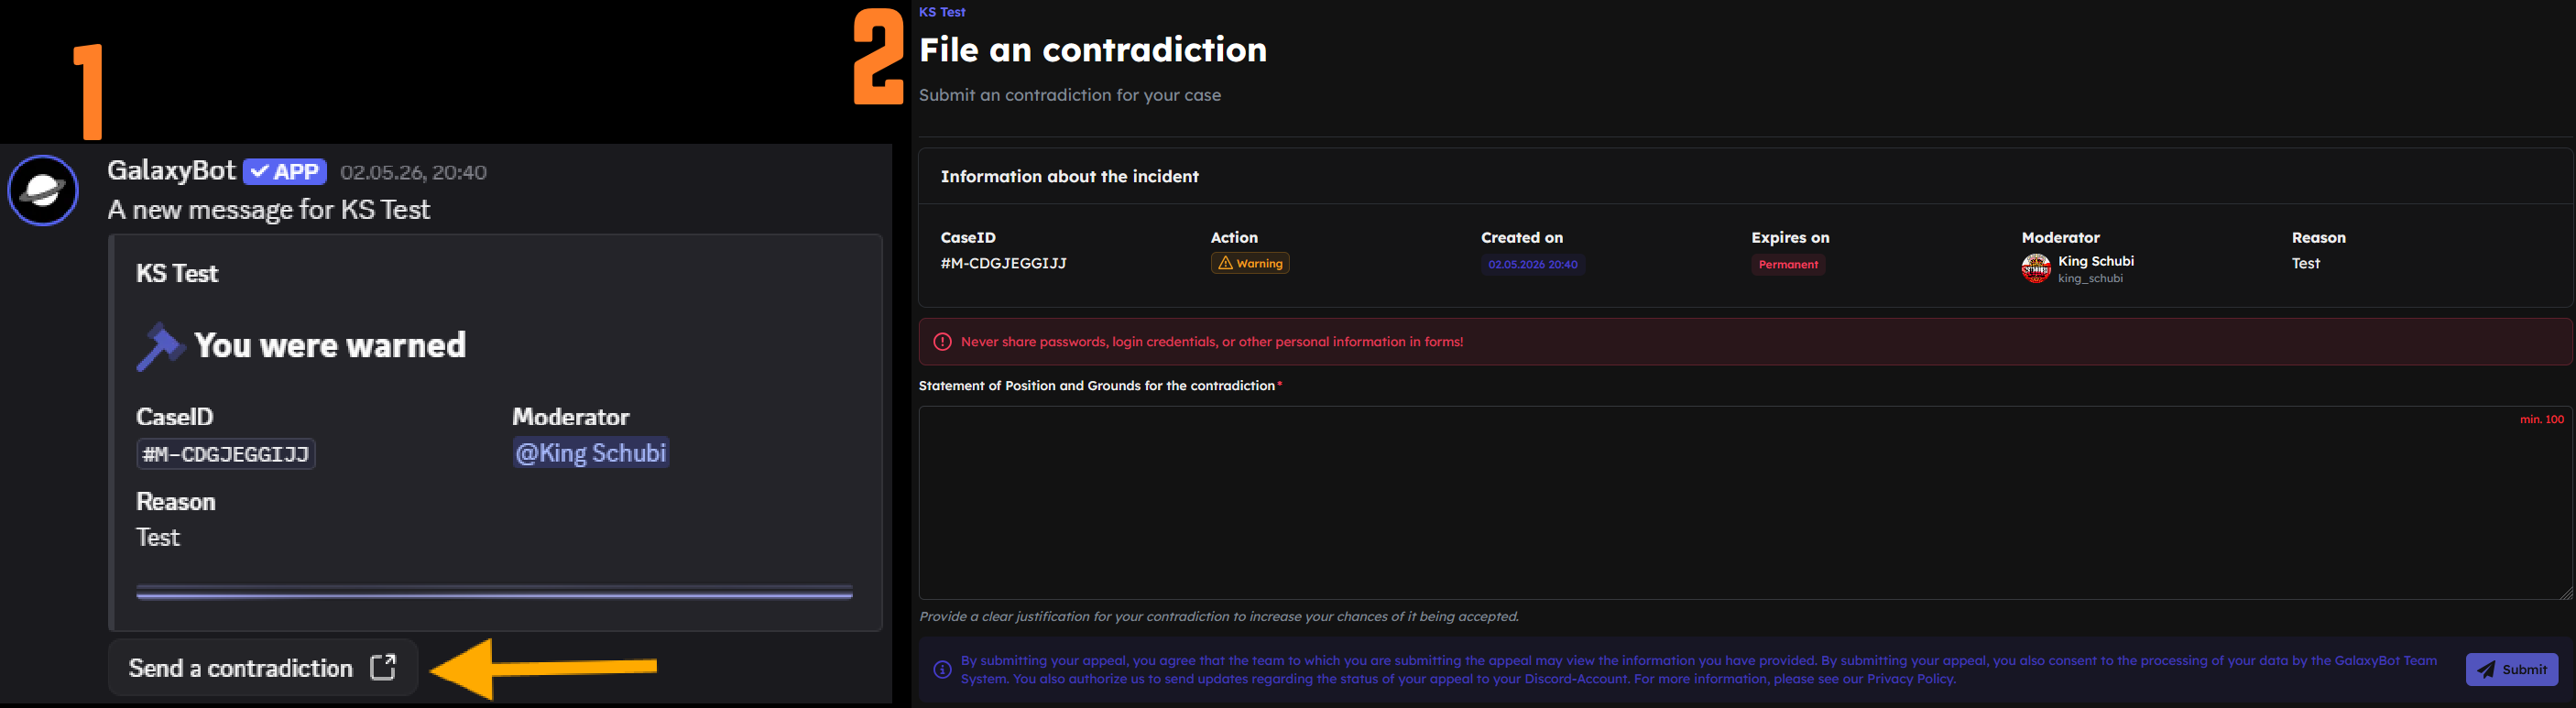
When the system is active, users have the option to lodge a one-off contradiction against the moderation decision. To do this, the bot sends a button via private message, which takes the user to a page where they can explain the grounds for their contradiction. They may submit this contradiction once. It is advisable to provide as detailed an explanation as possible, as nothing further can be added once it has been submitted.
Once submitted, the team will have access to the contradiction and, if notifications are enabled, will also receive a notification about it in the Discord channel.
View contradiction
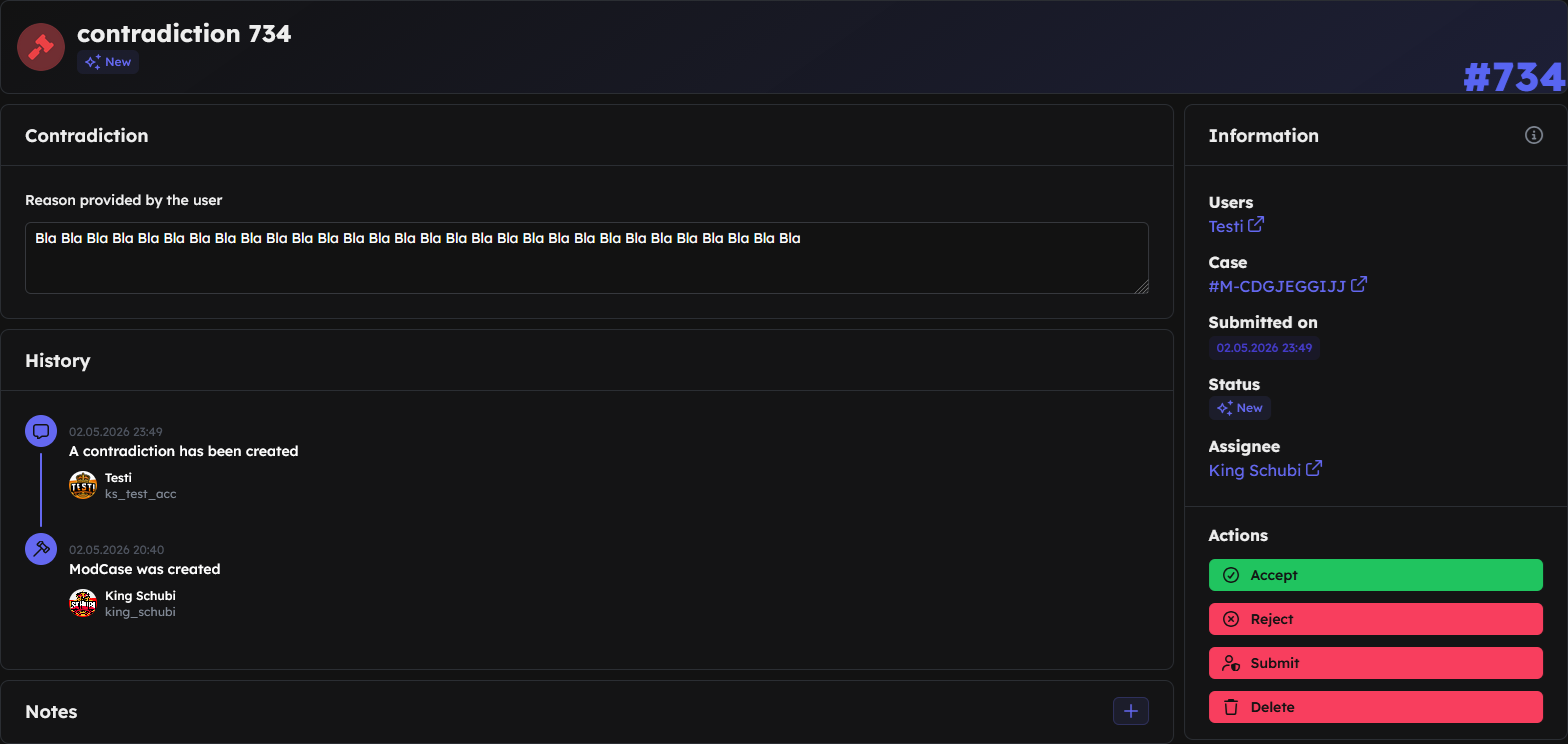
The contradiction is divided into:
- Left-hand side:
- Reasons (the reasons given by the user in the contradiction)
- History
- Notes
- Right-hand side:
- Information about the contradiction
- User (Who submitted the contradiction)
- Case ID (Which case the user has contradictioned against)
- Submitted on (When the user submitted the contradiction)
- Status (Is it still open or has a decision already been made?)
- Actions (see )
- Information about the contradiction
Accept contradictions

In order for a decision to be made on an contradiction, the contradiction must first be assigned to you. To do this, click on the button at the top: . From then on, this contradiction will be assigned to you.
Make a decision
The contradiction has now been assigned to you. It is your responsibility to reach an appropriate decision. It is best to refer to the server rules when doing so. You can discuss this as a team (the assignment does not preclude consultation). Make a well-considered decision, as the user cannot submit a further contradiction in this case. Once the decision has been made, you can confirm it using the two buttons above.
The contradiction is accepted. The bot will reverse the moderator action
- Warning: will be removed
- Timeout: will be lifted
- Kick: nothing will happen
- Ban: the user will be unbanned and the case in question will no longer be considered.
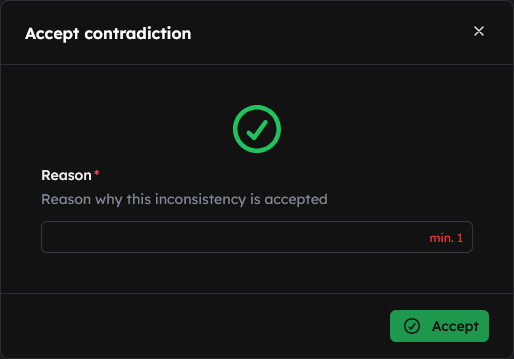
Please fill in the following details in the window that opens:
- Reason: Reason for acceptance (max. 255 characters)
If the contradiction is rejected, the case remains open.
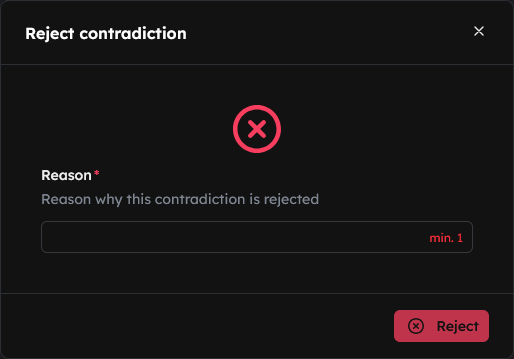
Please complete the following in the window that opens:
- Reason: Reason for the rejection (max. 255 characters)
If no decision is to be made, the case can be reassigned so that another team member can take over.
This function deletes the contradiction and should be used with caution. The user will not be notified of this. This action cannot be undone.
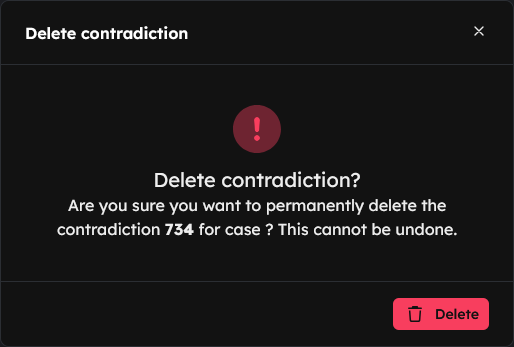
Please fill in the following details in the window that opens:
- Confirm: You must also confirm this to prevent accidental deletion
Team
Team list

In the Team List, you can manage your team on a clear, easy-to-navigate page. This includes changing roles, removing users from the team, and viewing an overview of all cases being worked on. All team members are listed on the overview page. You can adjust the sorting order using the icon in the top bar.
Click on the on the right to open a team member’s detailed profile.
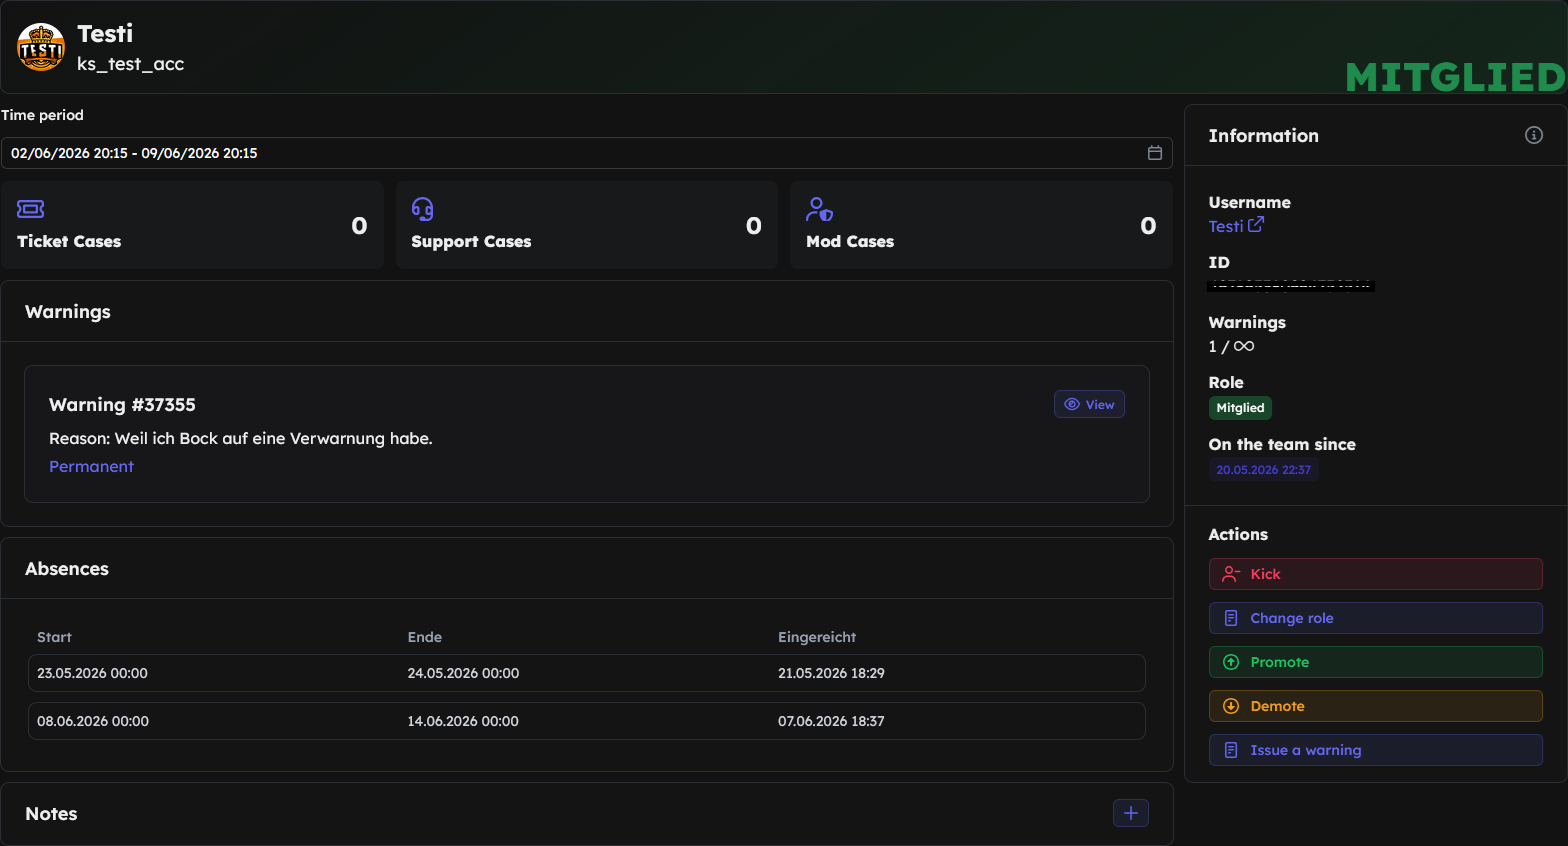
The profile is divided into:
- Left-hand side:
- Case Overview
- Time period (the period to be counted)
- Ticket cases (tickets processed during the period)
- Support cases (support cases processed during the period)
- Mod cases (mod actions processed during the period)
- Warnings (only if the Warnings System is enabled and at least 1 warning has been issued.)
- Absences (only if the Absence System is enabled and at least 1 absence is pending.)
- Notes
- Case Overview
- Right-hand side:
- Information
- Username
- User ID
- Warnings (number / maximum limit ( if there is no maximum limit))
- Role
- Date joined team
- Actions
This allows you to remove a member from the team.
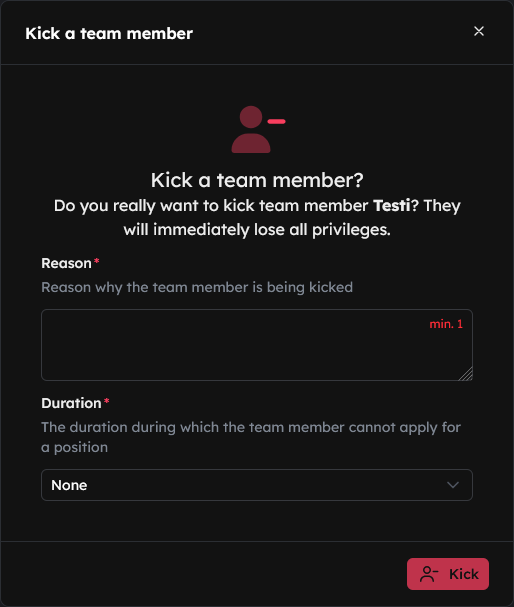
Please fill in the following details in the window that opens:
- Reason: Explanation (min. 1, max. 1000 characters)
- Duration: Application block (none, 1 week, 2 weeks, 30 days, 2 months, 3 months, 6 months, 1 year, permanent)
The team member will be automatically notified of the removal once it has been confirmed.Required in the Rights group: Kick team members, Manage team members.This allows you to change a team member's rank to any level.
The following must be entered in the window that opens:
- Role: The team rank you wish to switch to (any rank from the Career except your current rank)
- Reason: Reason for the rank change (max. 255 characters) It must also be indicated whether this is a promotion or a demotion.
Once confirmed, the team member will be automatically notified of the change to their role.Requires the following in the Rights group: Team members en/promote, Manage team members. For promotion actions to be visible, there must also be at least two ranks in the Career.This allows you to promote a team member by one rank.
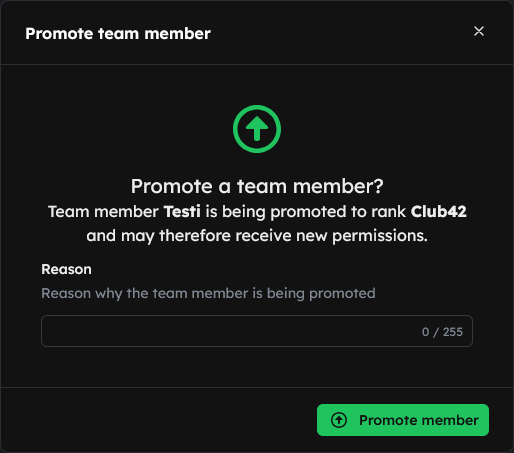
The following information must be entered in the window that opens:
- Reason: Reason for the change in ranking (max. 255 characters)
The team member will be automatically notified of the role change once it has been confirmed.Requires the following in the Rights group: Team members en/promote, Manage team members. For promotion actions to be visible, there must also be at least two ranks in the Career.This allows you to lower a team member's rank by one level.
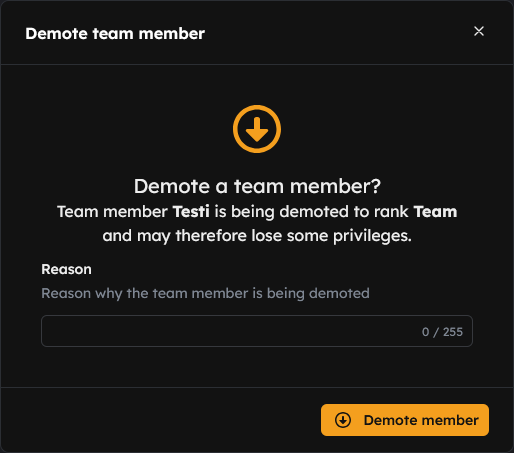
The following information must be entered in the window that opens:
- Reason: Reason for the change in ranking (max. 255 characters)
Once confirmed, the team member will be automatically notified of the change to their role.Requires the following in the Rights group: Team members en/promote, Manage team members. For promotion actions to be visible, there must also be at least two ranks in the Career.This allows you to issue a warning to a team member for misconduct.
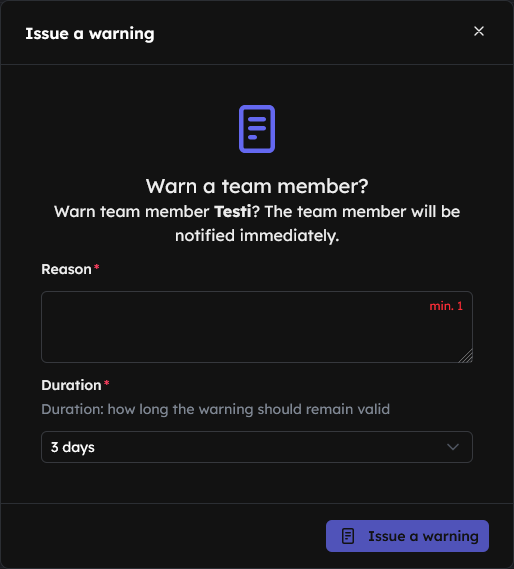
The following details must be entered in the window that opens:
- Reason: Reason for the warning (min. 1, max. 1000 characters)
- Duration: Validity period of the warning (3 days, 1 week, 2 weeks, 30 days, 2 months, 3 months, 6 months, 1 year, Permanent)
The team member will be automatically notified of the warning once it has been confirmed.Required in the Rights group: Team members warn. - Information
Absence

Under Absences, you’ll find an overview of all recorded absences. On the overview page, you can view 30 absences per page; use the icon in the top bar to change the sort order. At the very bottom, you can navigate to the next page.
You can filter the list in the top right-hand corner
- Future (default): Upcoming and current absences
- Past: Absences that have already taken place
- All: All absences
Entries can also be deleted using , but this should only be done with care.
View absences to view absences and Manage absences to delete absences.Complaint box

In the Complaint box, you can see all the entries received by your team. All entries are completely anonymous. Neither the system nor the team management can see who sent them. You can also see your own previously submitted messages here. On the overview page, you can always view 30 entries per page; use the icon in the top bar to change the sort order. At the very bottom, you can switch pages.
Manage complaint box to delete entries; all team members can view the complaint box.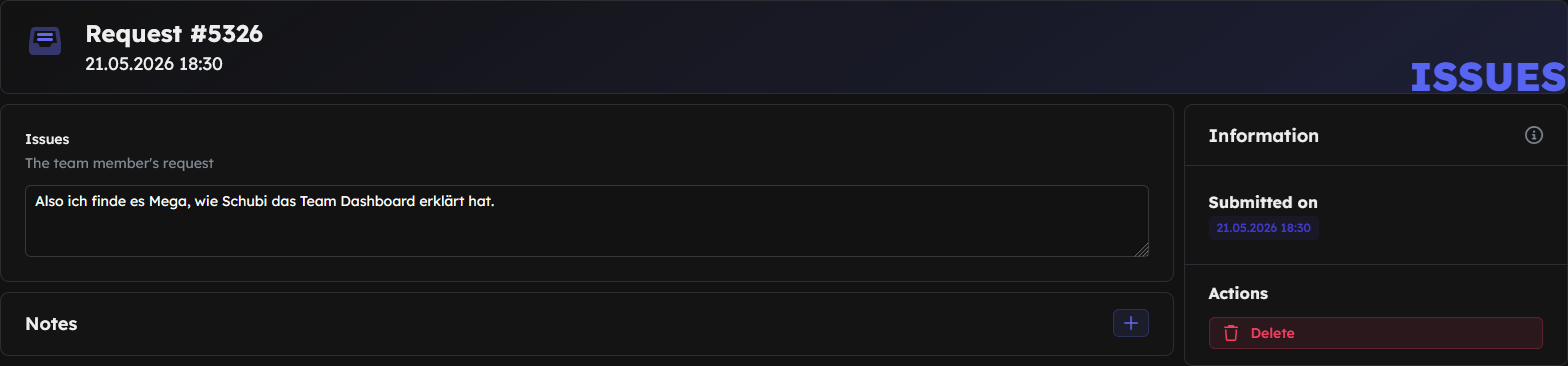
Click on the on the right to open the entry.
- Left-hand side:
- Subject
- Notes
- Right-hand side:
- Information
- Date submitted
- Actions
- Delete
- Information
Warnings

Under Warnings, you can see all the team warnings that have been issued. On the overview page, you can view 30 entries per page; use the icon in the top bar to change the sort order. At the very bottom, you can navigate to the next page.
You can filter the list in the top right-hand corner
- All: All warnings
- Active (default): Warnings that are currently still active
- Inactive: Warnings that have expired
Warn team members to be able to warn team members, view this page and delete entries.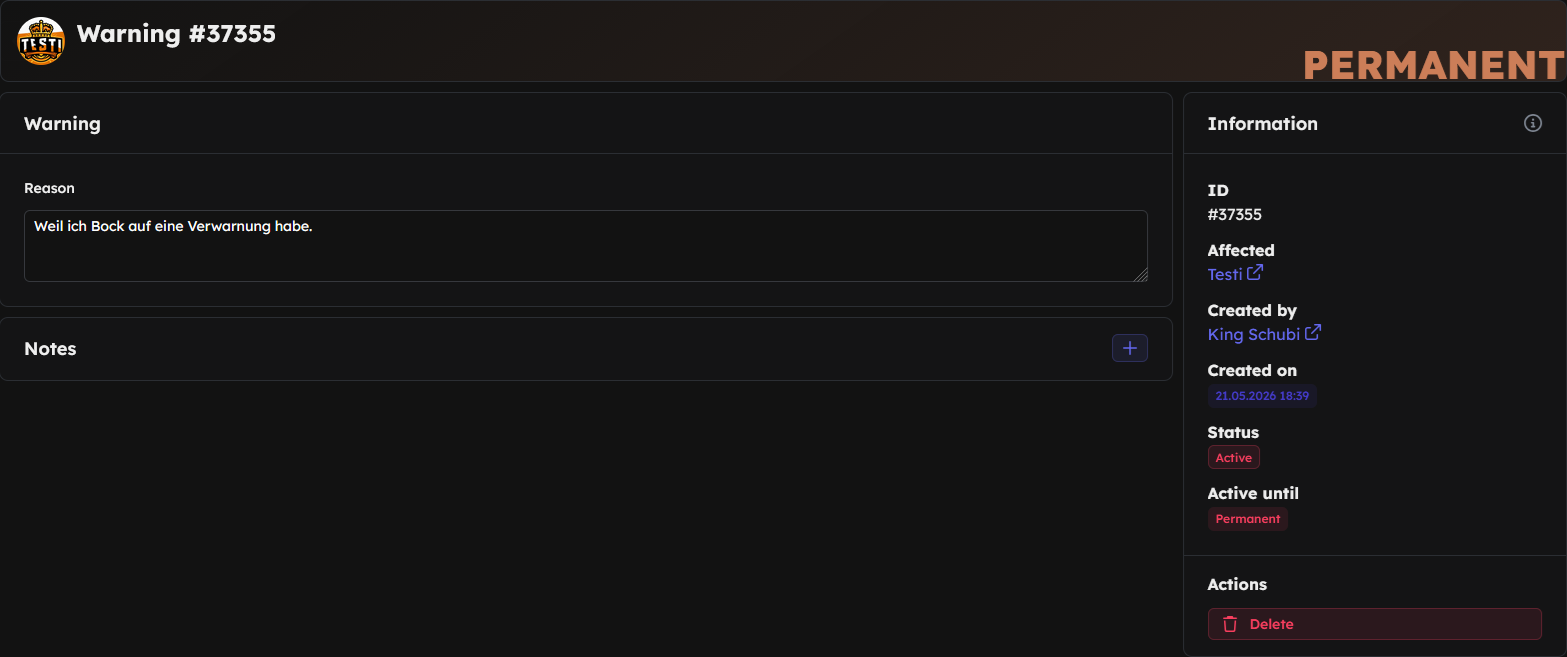
Click on the on the right to open the warning.
- Left-hand side:
- Reason
- Notes
- Right-hand side:
- Information
- Warning ID
- Team member concerned
- Issuer
- Date of warning
- Status
- Valid until
- Actions
- Delete
- Information
Application System
The application system makes it easy to create team applications and manage them efficiently.
Job Postings
All job postings are clearly displayed here and can be edited at any time.

Create a job posting
Go to Job Postings and click on in the top right-hand corner.
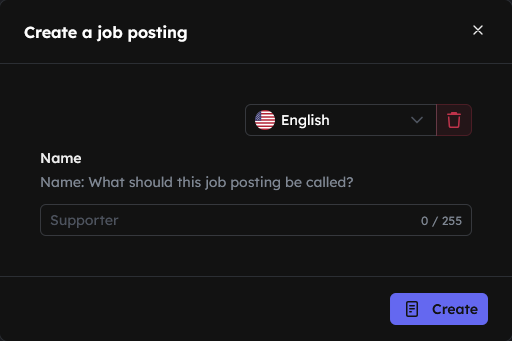
You can now give the job advertisement a name. You also have the option to enter the name in another language. We recommend creating the job advertisement in both German and English. If you select another language, you can enter the name in that language. If you wish to remove a language, simply click the button. Click the button to proceed to the next step.
Basic data
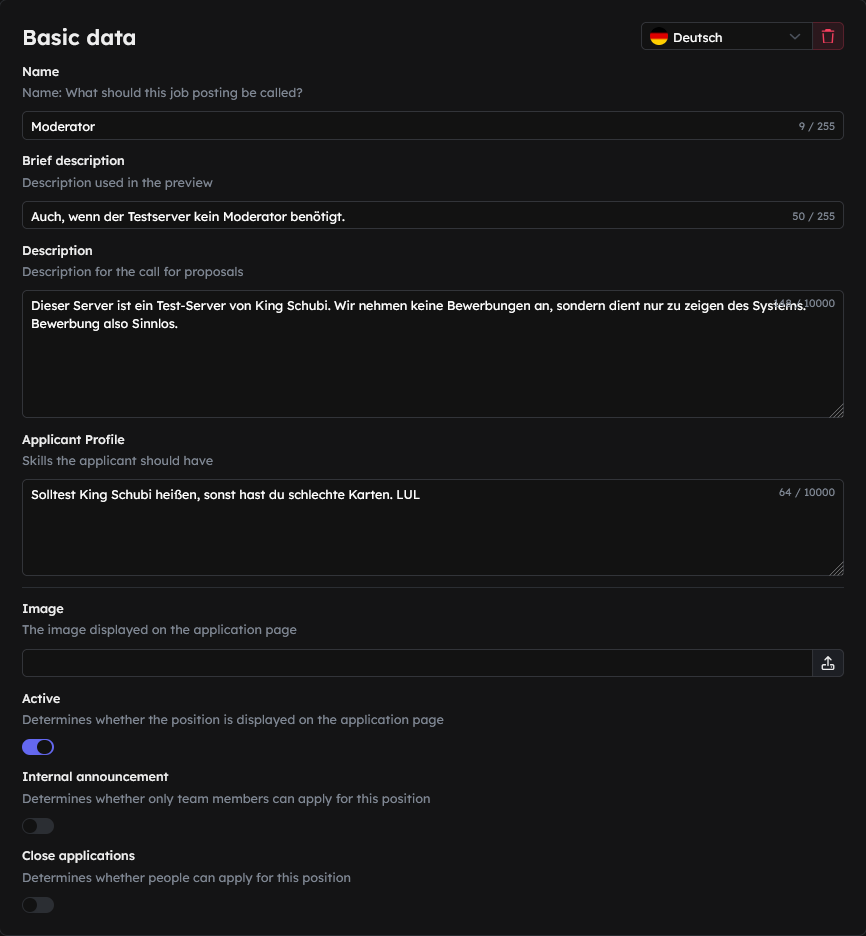
- Language: At the top, you can switch between languages.
- Basic details
- Name: This field displays the name you have chosen for the vacancy. This can be changed at any time.
- Short description: This text is displayed on the homepage in the application window as a brief overview of the role.
- Description: Here you can provide a more detailed description of what the role entails.
- Applicant profile: Here you can define the requirements for applicants (e.g. minimum age, skills, level of knowledge).
- Image: Here you can upload a cover image for the vacancy (click on ).
- Active: Determines the visibility of the vacancy. If the switch is active, the vacancy will be displayed on the vacancies page.
- Internal recruitment: If this option is enabled, only existing team members can apply, and the vacancy is only visible to them.
- Close applications: Once a sufficient number of applications have been received, this option can be enabled. The vacancy remains visible, but new applications can no longer be submitted.
View job postings to view them, and Manage job postings to create, edit and delete them.10MB, image formats: PNG, JPEG, GIF, WEBP.Create form fields
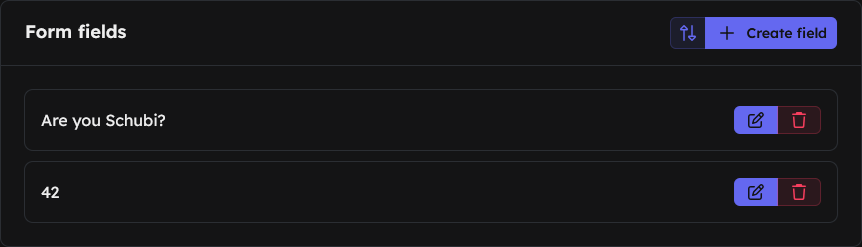
Click on to create a question for the applicant. In the window that now opens:
- Language: Language of the question. If you wish to delete a language, simply click on the button.
- Name: Here you can enter the question you wish to ask the applicant.
- Type: This is where you select which field is available to the applicant:
- Text: Single-line text field.
- Long text: Multi-line text field.
- Number: Single-line text field that only accepts numbers (0–9).
- Email: A single-line text field that checks whether the entry is a valid email address.
- URL: A single-line text field that checks whether the entry is a valid link.
Click on to save the question.
Repeat these steps for further questions.
In the form fields overview, there are two buttons on the right-hand side:
- : This allows you to edit the question at any time. However, the field type cannot be changed.
- : This deletes the question. This action cannot be undone. However, the question and the corresponding answer will remain in existing applications.
Save and Delete
There are two buttons available in the top bar on the right-hand side:
- : To save your changes.
- : To delete the entry.
Job application portal
The application portal is the place to go if you want to apply for a role in your team.
To view the list of vacancies on your server, click the button in the Job Vacancies section at the top of the blue "Application Portal" banner. Using copies the link, which you can share on your Discord server, for example. allows you to share the link system-wide, provided your browser supports this feature. The link always has the same structure: https://teams.galaxybot.app/application/[ServerID]
Job Vacancies
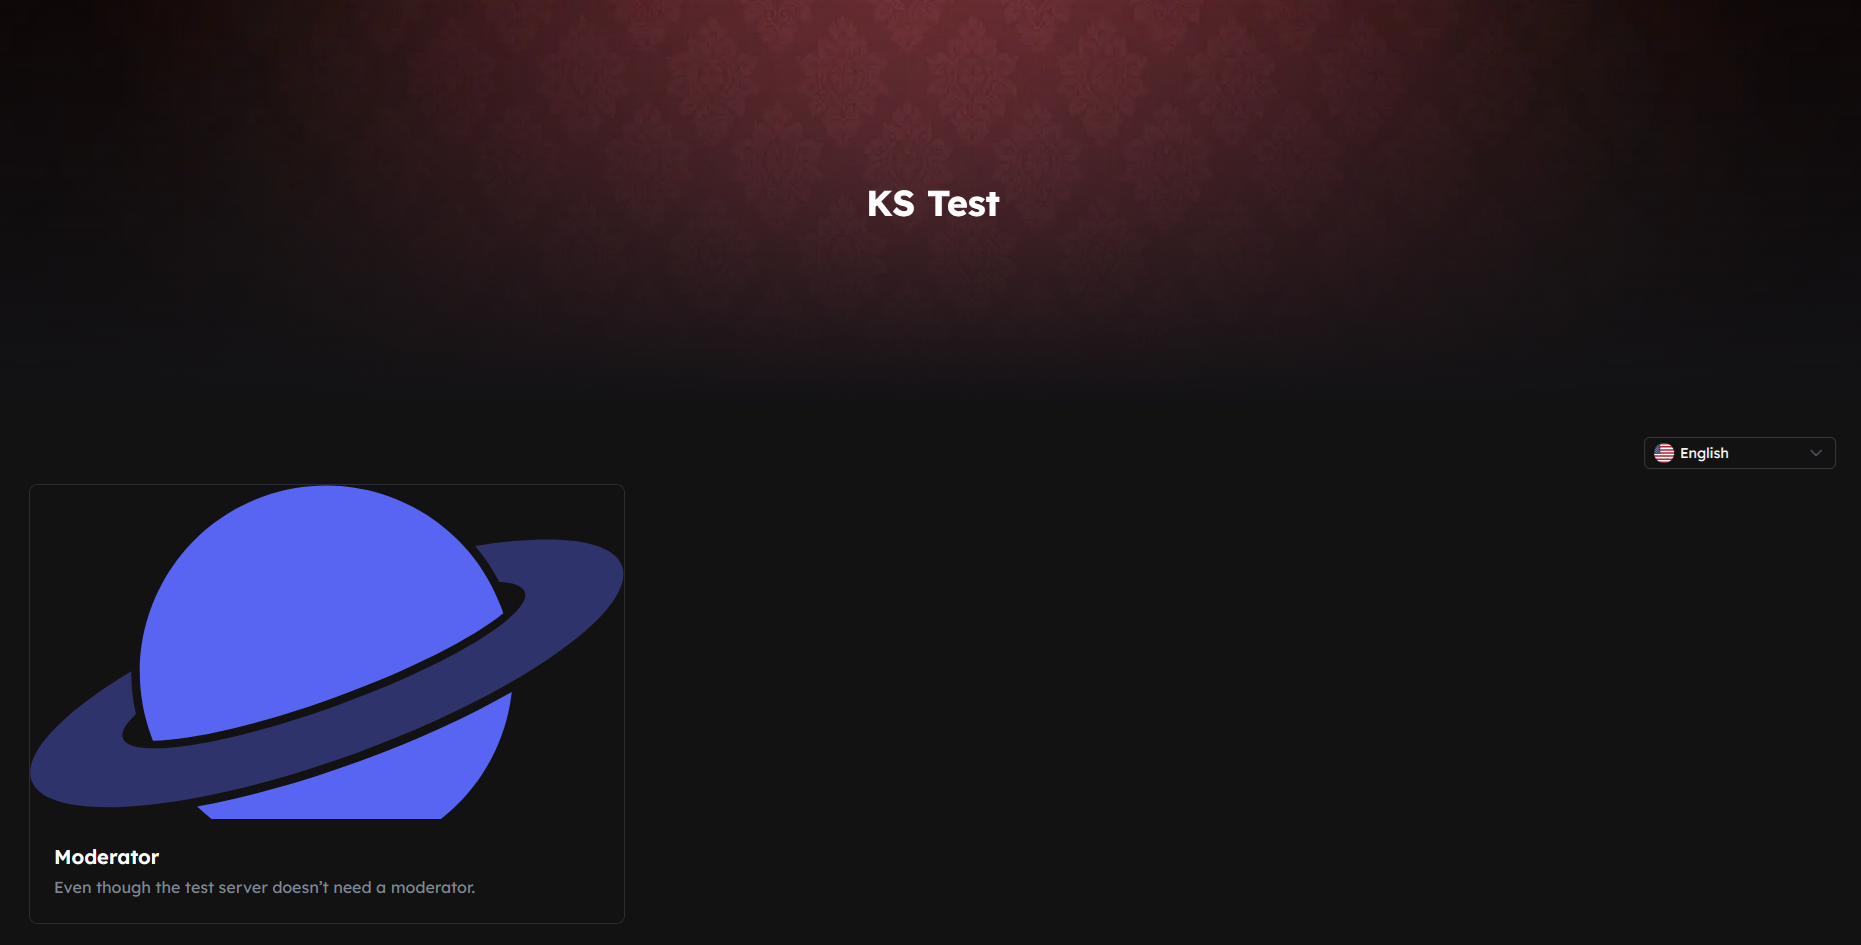
Users wishing to apply can view the available vacancies on this page:
- Both the job title and a brief description of the role are displayed.
- All users can view public vacancies.
- Team members can also view internal vacancies.
- For closed applications, the text
Applications closedappears in red above the title and the role cannot be selected.
By clicking on the relevant section, the user can view further details.
Submit your application
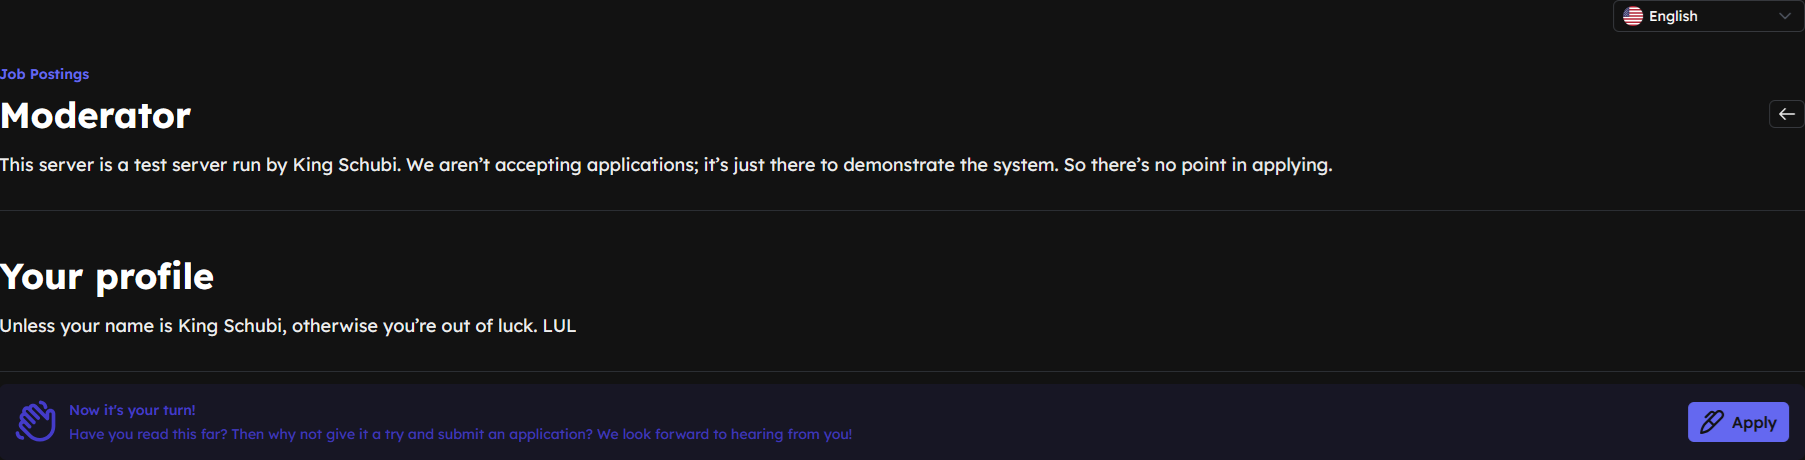
The user will now see the title and description of the vacancy. The defined candidate profile is displayed below this.
If the user is still interested, they can start the application process by clicking the button .
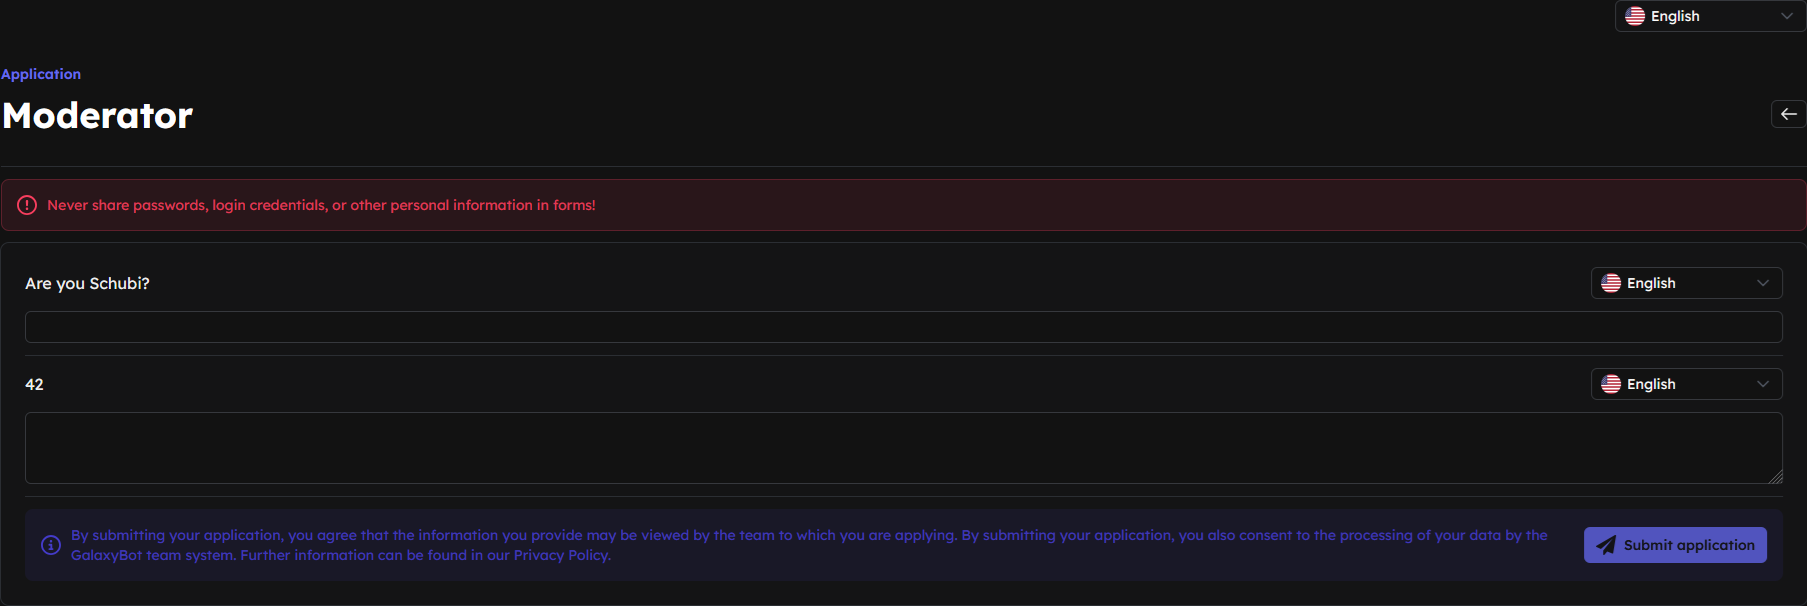
The applicant can now answer the questions provided. The relevant field types are available for this purpose.
Once all fields have been filled in correctly (incorrect entries such as 486gfdg467 in a numeric field will be blocked), the application can be submitted via . If the validation reports an error or a required field has been left blank, the button is highlighted in a darker shade and blocks the action ().
Inbox
Check inbox
Under Inbox, you can view all applications received. The overview page displays up to 30 entries per page; you can change the sort order using the icon in the top bar. At the bottom, you’ll find the navigation for further pages.

You can filter the list in the top right-hand corner:
- Pending (default): Applications that have not yet been processed or are currently being processed.
- Accepted: Applications that have been finalised and accepted.
- Rejected: Applications that have been finalised and rejected.
Click on the on the right to open an application form.
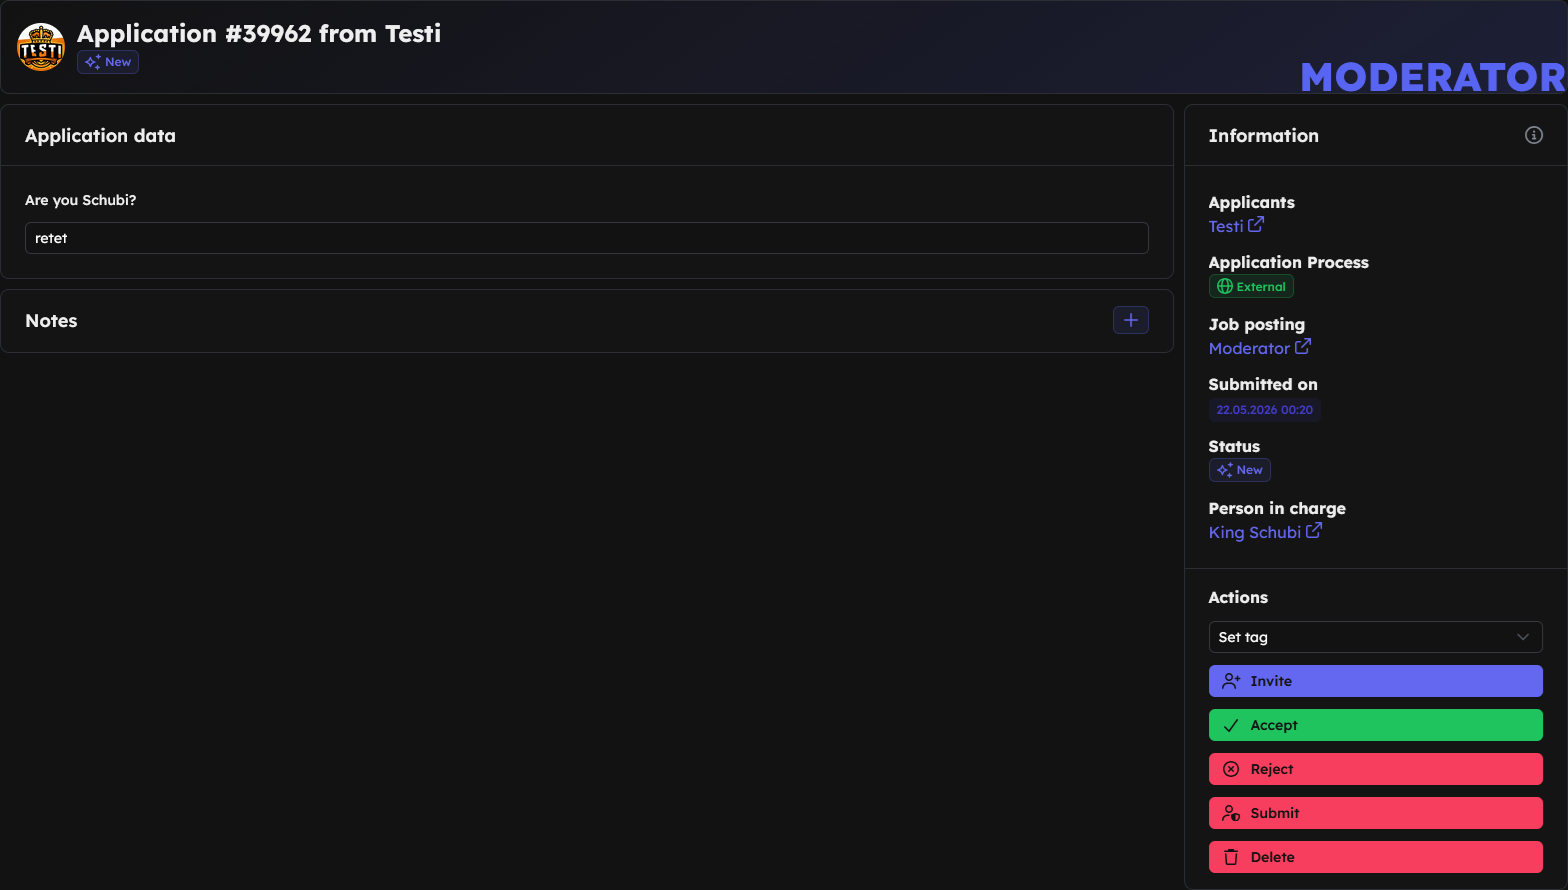
- Left-hand side:
- Application details: All the applicant’s answers to the questions asked.
- Notes
- Right-hand side:
- Information
- Applicant
- Application route
- Job advertisement
- Submission date
- Status
- Person responsible (who is handling the application)
- Actions (see
- Information
View applications to view applications, Manage applications for accepting and making decisions, and Accept application (Force) to reassign applications that have already been accepted.Accept application

Click on in the top-left corner to assign the application to yourself. This lets the rest of the team know who is responsible for the case and unlocks further actions.
Make a decision
The application has now been assigned for processing. It is your responsibility to decide how to proceed and, if necessary, to consult with other team members. Please make a careful decision or invite the applicant for an interview.
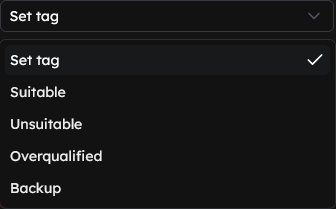 This allows you to tag the application with specific tags and add further notes. Only one tag can be selected at a time:
- Remove tag (Removes the tag)
- Suitable (The applicant is qualified for the role)
- Unsuitable (The applicant is not suitable for this role)
- Overqualified (The applicant has experience suitable for a higher position)
- Backup (The applicant is placed on hold and may be considered at a later date)
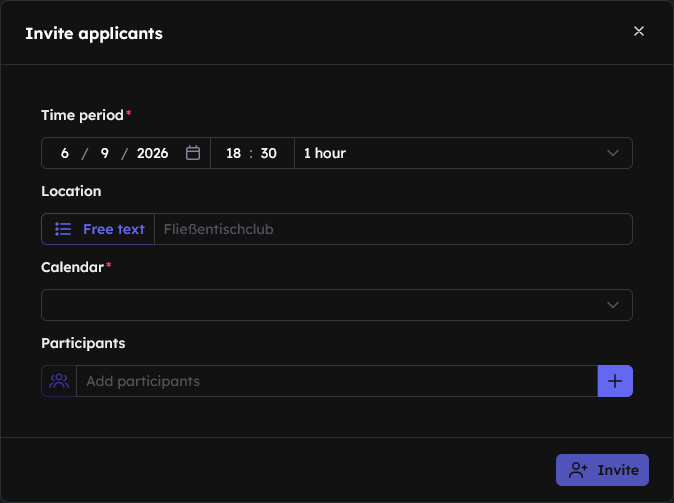 If further information is required, the applicant may be invited to an interview. The following window allows you to specify the details:
- Time (date, time, estimated duration)
- Location (free text or Discord voice channel)
- Calendar (which internal calendar the appointment will be added to)
- Participants (other team members who should attend, including those required to attend)
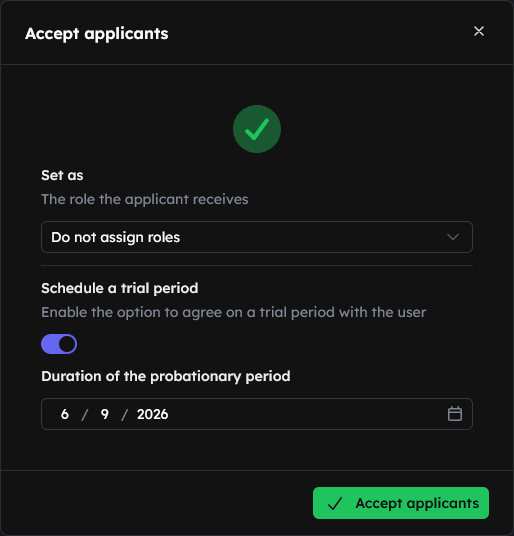 The application has been accepted. In the following window, you can specify:
- the role the applicant is to be assigned
- whether there should be a probationary period
- the end date of the probationary period (if selected)
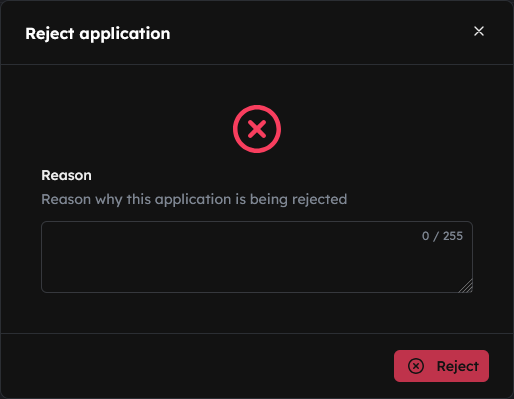 The application will be rejected. You can provide a reason in the pop-up window.
If the final decision is to be made by another team member, the application can be submitted via this channel.
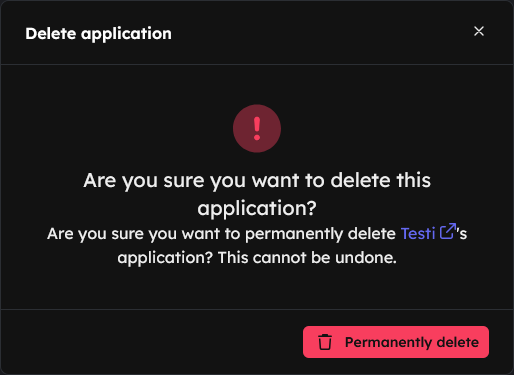 This will permanently delete the application from the system. This function should be used with the utmost care. The applicant will not receive a separate notification regarding this. You must also confirm this action to avoid accidental deletion
Your user profile
The navigation bar (at the very bottom left) offers additional options:
Settings
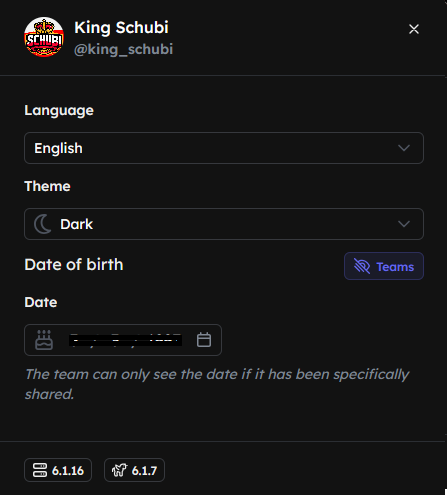
Language
Here you can set the language for your Team Dashboard. The following languages are currently available. If you spot an error in the translation, please report it on our Discord server.
- English
- Deutsch
- Italiano
- Nederlands
- Français
Theme
Here you can change the look of the site.
- System default
- Light
- Dark
Date of birth
Here you can enter your date of birth. Use the button to specify which teams can see this information and which cannot.
Connections
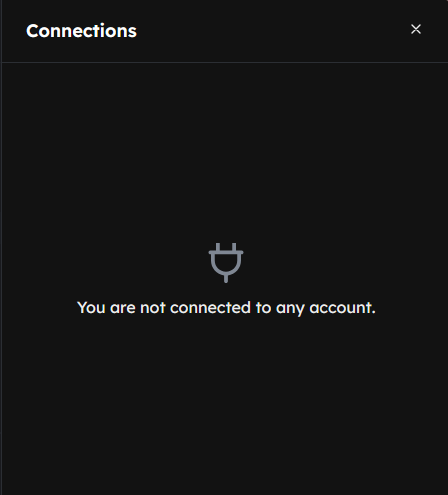
Log out
Click here to log out of your account. You will then be redirected to the login page. This can also help resolve some bugs by clearing your cookies.
Notification ()
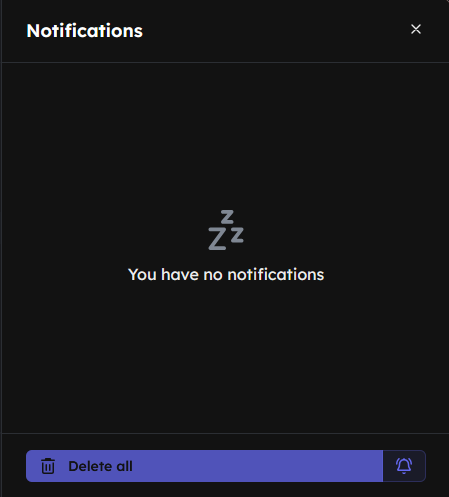
Notifications appear here. Whether it’s a new application, a new post or similar. No matter where you are, you’ll receive notifications for every team in this menu at any time, so you never miss anything important.
- deletes all notifications
- allows you to enable or disable notifications so that you receive them from your browser at any time.